Image Processing
The Image Page Resource
The image is a Page Resource, and the processing methods listed below do not work on images inside your /static folder.
To print all images paths in a Page Bundle:
{{ with .Resources.ByType "image" }}
{{ range . }}
{{ .RelPermalink }}
{{ end }}
{{ end }}
The Image Resource
The image resource can also be retrieved from a global resource
{{- $image := resources.Get "images/logo.jpg" -}}
Image Processing Methods
The image resource implements the Resize, Fit, Fill, and Filter methods, each returning a transformed image using the specified dimensions and processing options.
Resize
Resizes the image to the specified width and height.
// Resize to a width of 600px and preserve ratio
{{ $image := $resource.Resize "600x" }}

// Resize to a height of 400px and preserve ratio
{{ $image := $resource.Resize "x400" }}

// Resize to a width 600px and a height of 400px
{{ $image := $resource.Resize "600x400" }}
Fit
Scale down the image to fit the given dimensions while maintaining aspect ratio. Both height and width are required.
{{ $image := $resource.Fit "600x400" }}
Fill
Resize and crop the image to match the given dimensions. Both height and width are required.
{{ $image := $resource.Fill "600x400" }}
Filter
Apply one or more filters to your image. See Image Filters for a full list.
{{ $img = $img.Filter (images.GaussianBlur 6) (images.Pixelate 8) }}
The above can also be written in a more functional style using pipes:
{{ $img = $img | images.Filter (images.GaussianBlur 6) (images.Pixelate 8) }}
The filters will be applied in the given order.
Sometimes it can be useful to create the filter chain once and then reuse it:
{{ $filters := slice  (images.GaussianBlur 6) (images.Pixelate 8) }}
{{ $img1 = $img1.Filter $filters }}
{{ $img2 = $img2.Filter $filters }}
Exif
Provides an Exif object with metadata about the image.
Note that this is only supported for JPEG and TIFF images, so it’s recommended to wrap the access with a with, e.g.:
{{ with $img.Exif }}
Date: {{ .Date }}
Lat/Long: {{ .Lat}}/{{ .Long }}
Tags:
{{ range $k, $v := .Tags }}
TAG: {{ $k }}: {{ $v }}
{{ end }}
{{ end }}
Or individually access EXIF data with dot access, e.g.:
{{ with $src.Exif }}
  <ul>
      {{ with .Date }}<li>Date: {{ .Format "January 02, 2006" }}</li>{{ end }}
      {{ with .Tags.ApertureValue }}<li>Aperture: {{ lang.NumFmt 2 . }}</li>{{ end }}
      {{ with .Tags.BrightnessValue }}<li>Brightness: {{ lang.NumFmt 2 . }}</li>{{ end }}
      {{ with .Tags.ExposureTime }}<li>Exposure Time: {{ . }}</li>{{ end }}
      {{ with .Tags.FNumber }}<li>F Number: {{ . }}</li>{{ end }}
      {{ with .Tags.FocalLength }}<li>Focal Length: {{ . }}</li>{{ end }}
      {{ with .Tags.ISOSpeedRatings }}<li>ISO Speed Ratings: {{ . }}</li>{{ end }}
      {{ with .Tags.LensModel }}<li>Lens Model: {{ . }}</li>{{ end }}
  </ul>
{{ end }}
Some fields may need to be formatted with lang.NumFmt function to prevent display like Aperture: 2.278934289 instead of Aperture: 2.28.
Exif fields
- Date
- “photo taken” date/time
- Lat
- “photo taken where”, GPS latitude
- Long
- “photo taken where”, GPS longitude
See Image Processing Config for how to configure what gets included in Exif.
Image Processing Options
In addition to the dimensions (e.g. 600x400), Hugo supports a set of additional image options.
Background Color
The background color to fill into the transparency layer. This is mostly useful when converting to a format that does not support transparency, e.g. JPEG.
You can set the background color to use with a 3 or 6 digit hex code starting with #.
{{ $image.Resize "600x jpg #b31280" }}
For color codes, see https://www.google.com/search?q=color+picker
Note that you also set a default background color to use, see Image Processing Config.
JPEG Quality
Only relevant for JPEG images, values 1 to 100 inclusive, higher is better. Default is 75.
{{ $image.Resize "600x q50" }}
Rotate
Rotates an image by the given angle counter-clockwise. The rotation will be performed first to get the dimensions correct. The main use of this is to be able to manually correct for EXIF orientation of JPEG images.
{{ $image.Resize "600x r90" }}
Anchor
Only relevant for the Fill method. This is useful for thumbnail generation where the main motive is located in, say, the left corner.
Valid values are Smart, Center, TopLeft, Top, TopRight, Left, Right, BottomLeft, Bottom, BottomRight.
Default value is Smart, which uses Smartcrop to determine the best crop.
{{ $image.Fill "300x200 BottomLeft" }}
Resample Filter
Filter used in resizing. Default is Box, a simple and fast resampling filter appropriate for downscaling.
Examples are: Box, NearestNeighbor, Linear, Gaussian.
See https://github.com/disintegration/imaging for more. If you want to trade quality for faster processing, this may be a option to test.
{{ $image.Resize "600x400 Gaussian" }}
Target Format
By default the images is encoded in the source format, but you can set the target format as an option.
Valid values are jpg, png, tif, bmp, and gif.
{{ $image.Resize "600x jpg" }}
Image Processing Examples
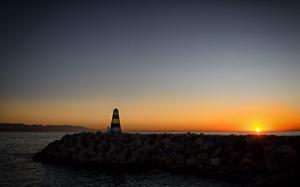
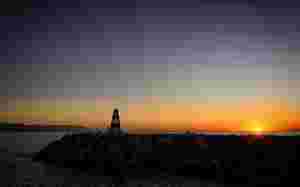
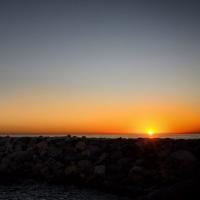
The photo of the sunset used in the examples below is Copyright Bjørn Erik Pedersen (Creative Commons Attribution-Share Alike 4.0 International license)


This is the shortcode used in the examples above:
{{ $original := .Page.Resources.GetMatch (printf "*%s*" (.Get 0)) }}
{{ $command := .Get 1 }}
{{ $options := .Get 2 }}
{{ if eq $command "Fit"}}
{{ .Scratch.Set "image" ($original.Fit $options) }}
{{ else if eq $command "Resize"}}
{{ .Scratch.Set "image" ($original.Resize $options) }}
{{ else if eq $command "Fill"}}
{{ .Scratch.Set "image" ($original.Fill $options) }}
{{ else }}
{{ errorf "Invalid image processing command: Must be one of Fit, Fill or Resize."}}
{{ end }}
{{ $image := .Scratch.Get "image" }}
<figure style="padding: 0.25rem; margin: 2rem 0; background-color: #cccc">
	<img style="max-width: 100%; width: auto; height: auto;" src="{{ $image.RelPermalink }}" width="{{ $image.Width }}" height="{{ $image.Height }}">
	<figcaption>
	<small>
	{{ with .Inner }}
	{{ . }}
	{{ else }}
	.{{ $command }} "{{ $options }}"
	{{ end }}
	</small>
	</figcaption>
</figure>
And it is used like this:
{{< imgproc sunset Resize "300x" />}}
Image Processing Config
You can configure an imaging section in config.toml with default image processing options:
[imaging]
# Default resample filter used for resizing. Default is Box,
# a simple and fast averaging filter appropriate for downscaling.
# See https://github.com/disintegration/imaging
resampleFilter = "box"

# Default JPEG quality setting. Default is 75.
quality = 75

# Anchor used when cropping pictures.
# Default is "smart" which does Smart Cropping, using https://github.com/muesli/smartcrop
# Smart Cropping is content aware and tries to find the best crop for each image.
# Valid values are Smart, Center, TopLeft, Top, TopRight, Left, Right, BottomLeft, Bottom, BottomRight
anchor = "smart"

# Default background color.
# Hugo will preserve transparency for target formats that supports it,
# but will fall back to this color for JPEG.
# Expects a standard HEX color string with 3 or 6 digits.
# See https://www.google.com/search?q=color+picker
bgColor = "#ffffff"

[imaging.exif]
 # Regexp matching the fields you want to Exclude from the (massive) set of Exif info
# available. As we cache this info to disk, this is for performance and
# disk space reasons more than anything.
# If you want it all, put ".*" in this config setting.
# Note that if neither this or ExcludeFields is set, Hugo will return a small
# default set.
includeFields = ""

# Regexp matching the Exif fields you want to exclude. This may be easier to use
# than IncludeFields above, depending on what you want.
excludeFields = ""

# Hugo extracts the "photo taken" date/time into .Date by default.
# Set this to true to turn it off.
disableDate = false

# Hugo extracts the "photo taken where" (GPS latitude and longitude) into
# .Long and .Lat. Set this to true to turn it off.
disableLatLong = false
Smart Cropping of Images
By default, Hugo will use Smartcrop, a library created by muesli, when cropping images with .Fill. You can set the anchor point manually, but in most cases the smart option will make a good choice. And we will work with the library author to improve this in the future.
An example using the sunset image from above:

Image Processing Performance Consideration
Processed images are stored below <project-dir>/resources (can be set with resourceDir config setting). This folder is deliberately placed in the project, as it is recommended to check these into source control as part of the project. These images are not “Hugo fast” to generate, but once generated they can be reused.
If you change your image settings (e.g. size), remove or rename images etc., you will end up with unused images taking up space and cluttering your project.
To clean up, run:
hugo --gc